Creating your environment
Starting AWS Cloud9 IDE
AWS Cloud9 is a cloud-based integrated development environment (IDE) that lets you write, run, and debug your code with just a browser. It includes a code editor, debugger, and terminal. Cloud9 comes pre-packaged with essential tools for popular programming languages and the AWS Command Line Interface (CLI) pre-installed so you don’t need to install files or configure your laptop for this workshop.
Your Cloud9 environment will have access to the same AWS resources as the user with which you logged into the AWS Management Console. We strongly recommend using Cloud9 to complete this workshop.
Cloud9 works best with Chrome or Firefox, not Safari. It cannot be used from a tablet.
⭐ Make sure to set up your Cloud9 setup in us-east-1 (North Virginia) region only!
✅ Step-by-step Instructions
- From the AWS Management Console, Select Services then select Cloud9 under Developer Tools.
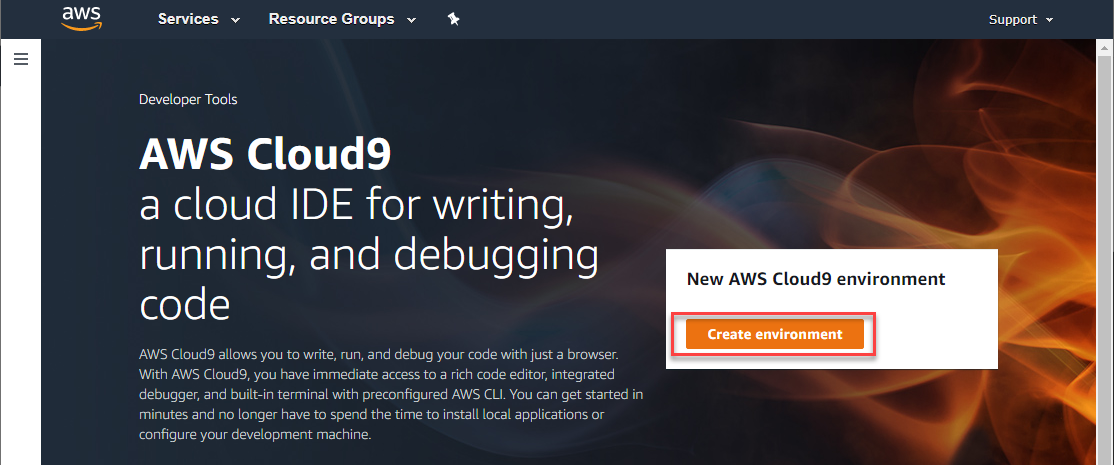
Select Create environment.
Enter
epsagon-developmentinto Name and optionally provide a Description.
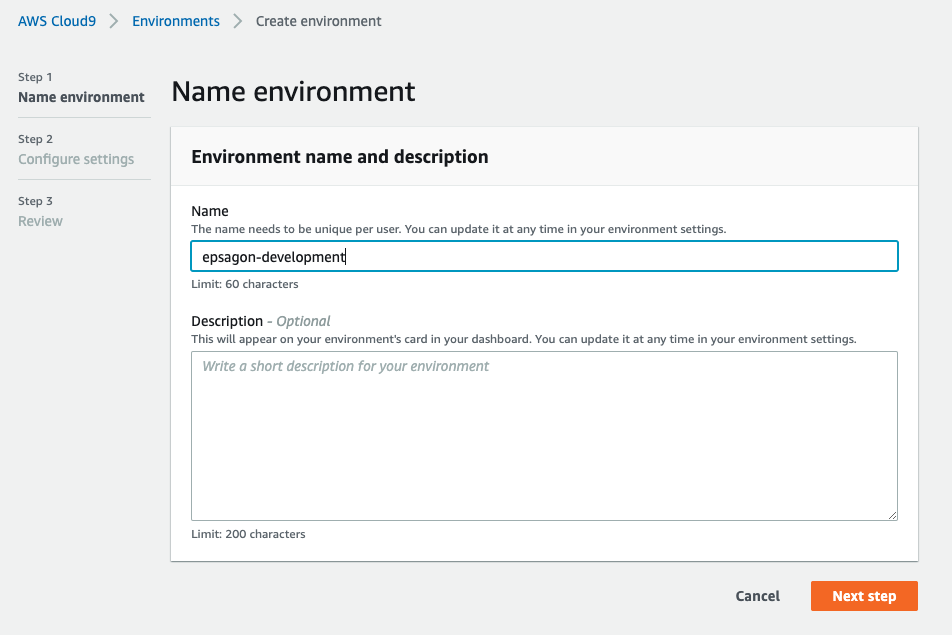
Select Next step.
In Environment settings:
Set the Instance type to t2.micro (1 GiB RAM + 1 vCPU).
Set the Platform to Amazon Linux 2.
Leave all other defaults unchanged.
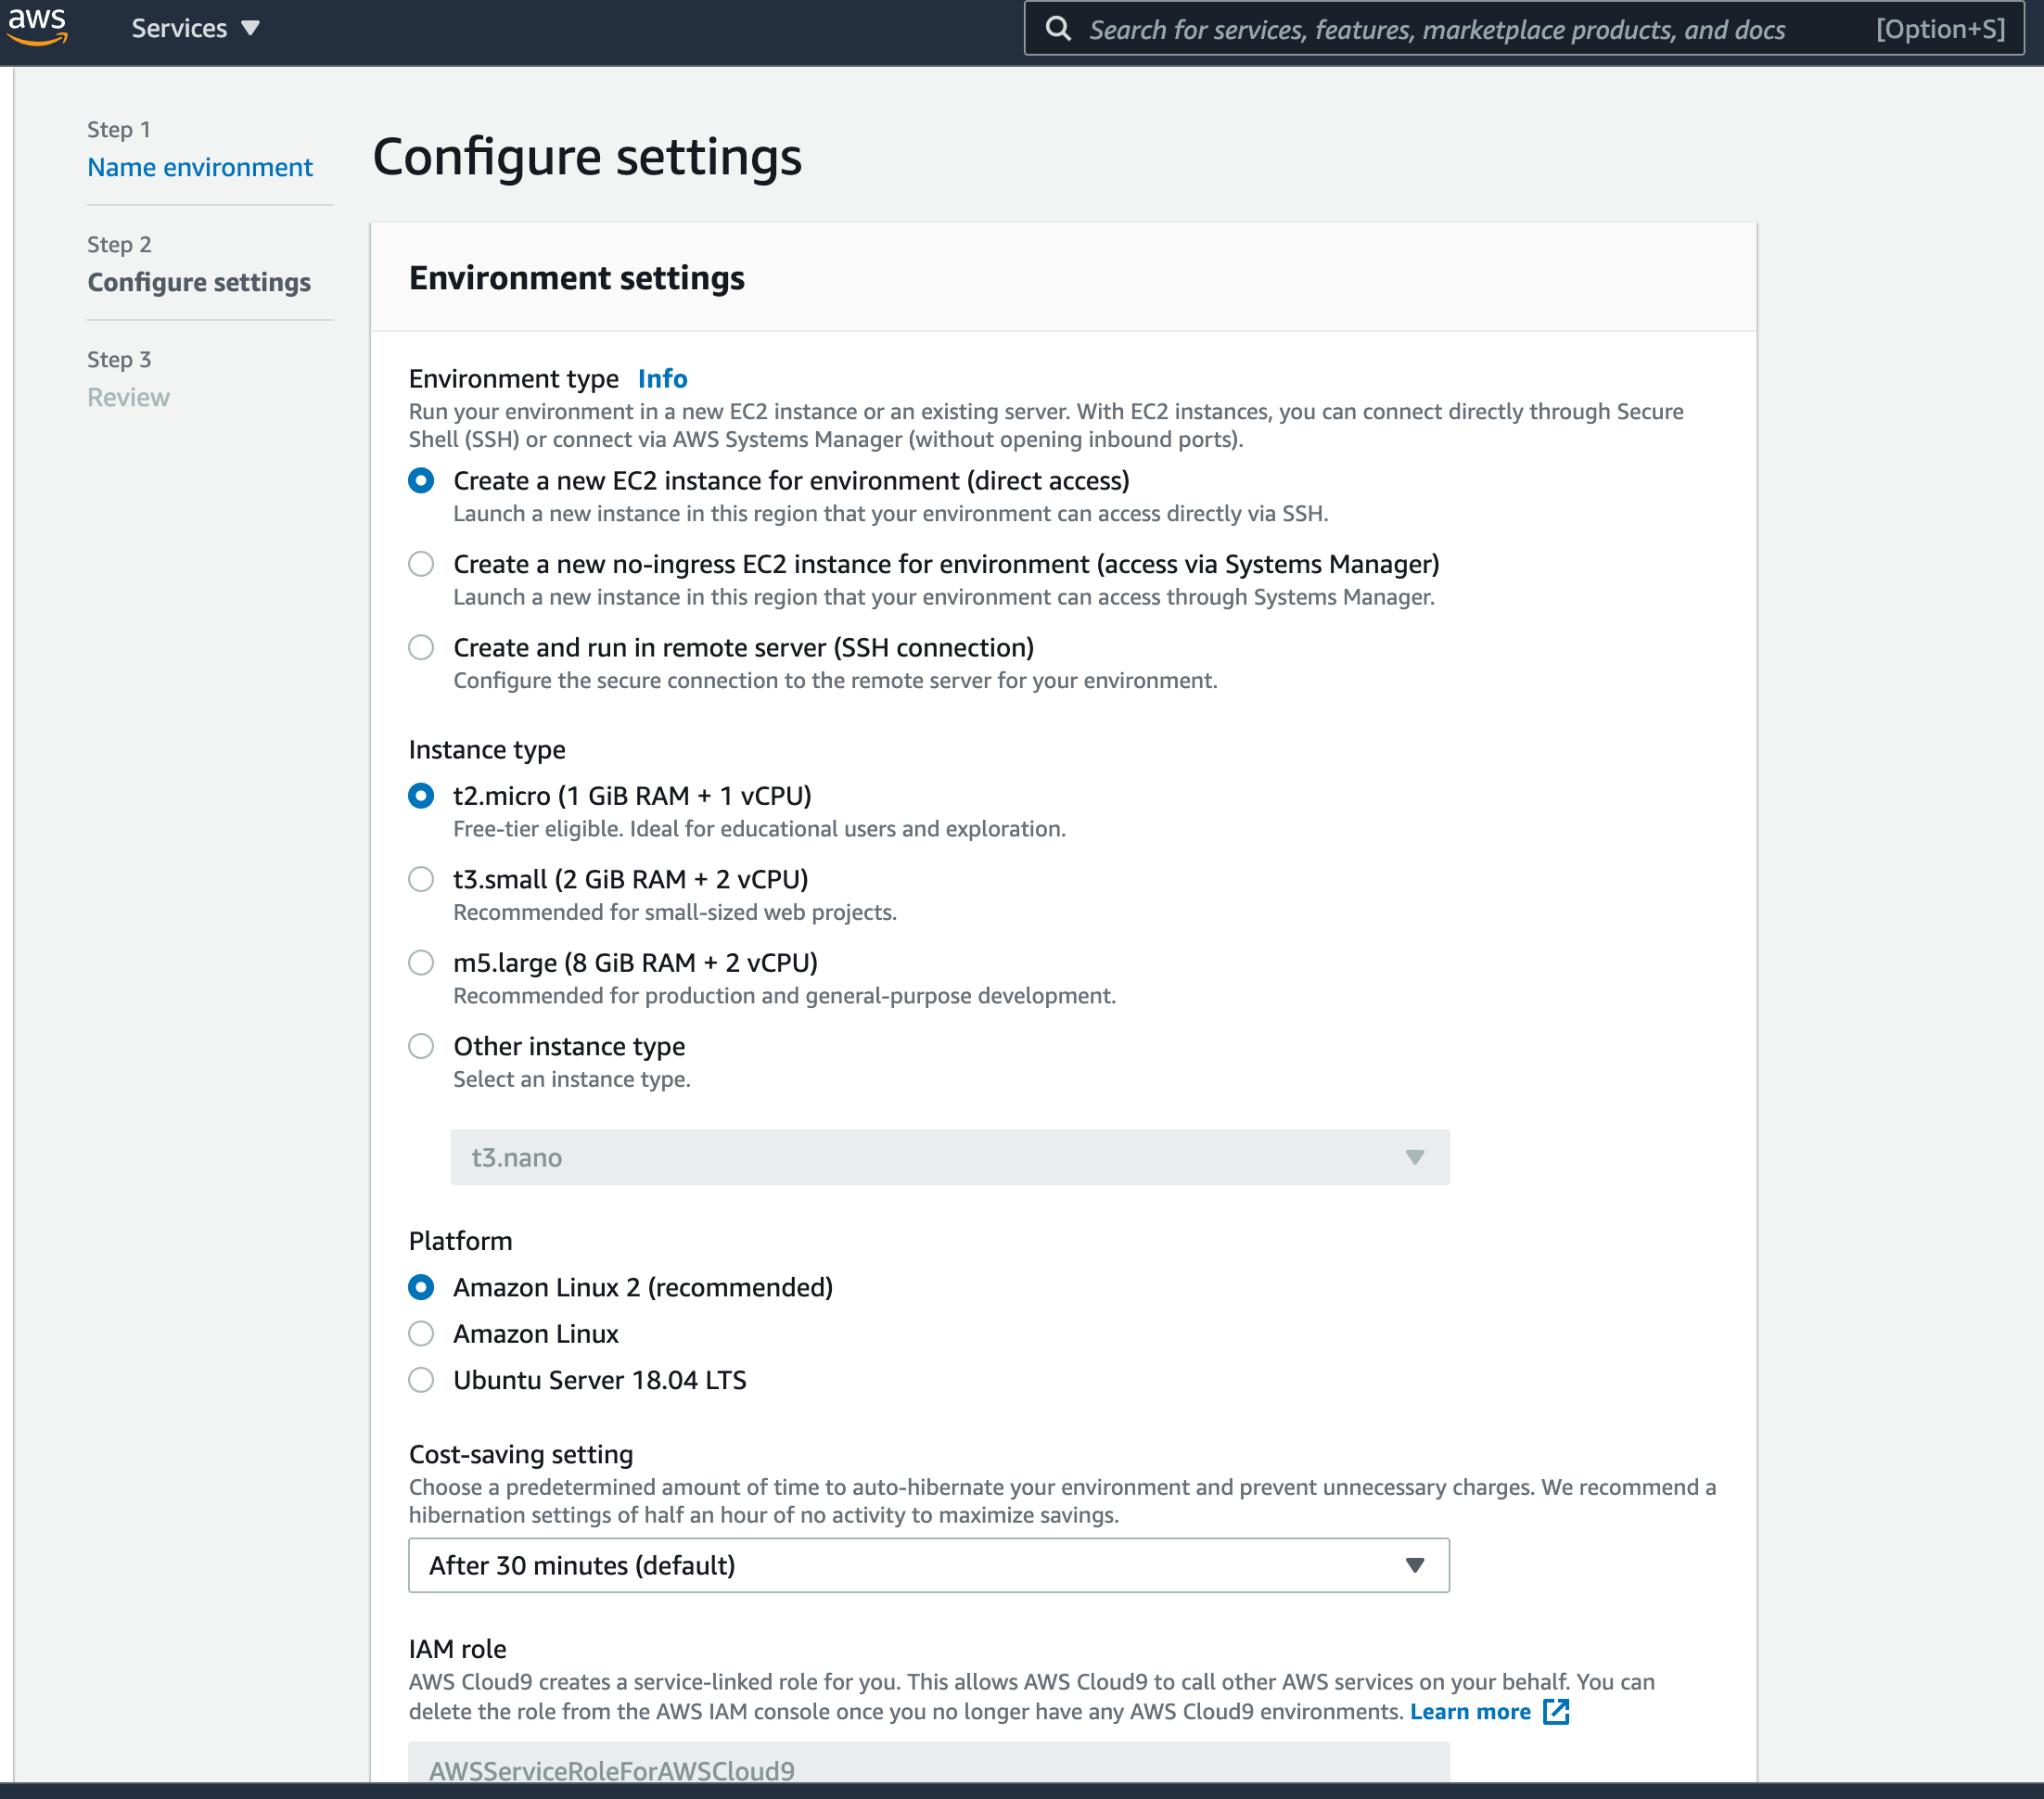
Select Next step.
Review the environment settings and select Create environment. It will take a couple of minutes for your Cloud9 environment to be provisioned and prepared.
Setting up Cloud9 IDE
- Once ready, your IDE will open to a welcome screen. Below that, you should see a terminal prompt. Close the Welcome tab and drag up the terminal window to give yourself more space to work in.

- You can run AWS CLI commands in here just like you would on your local computer. Remember for this workshop to run all commands within the Cloud9 terminal window rather than on your local computer.
- Keep your AWS Cloud9 IDE opened in a browser tab throughout this workshop.
Verify that your user is logged in by running the command
aws sts get-caller-identity. Copy and paste the command into the Cloud9 terminal window.aws sts get-caller-identity
You’ll see output indicating your account and user information:
{
"Account": "123456789012",
"UserId": "AKIAIOSFODNN7EXAMPLE",
"Arn": "arn:aws:iam::123456789012:user/Alice"
}
⭐ Tips
💡 Keep an open scratch pad in Cloud9 or a text editor on your local computer for notes. When the step-by-step directions tell you to note something such as an ID or Amazon Resource Name (ARN), copy and paste that into your scratch pad.
⭐ Recap
🔑 This is your unique AWS account for this workshop. It will expire after you finish today.
🔑 Use the same region for the entirety of this workshop.
🔑 Keep your AWS Cloud9 IDE opened in a browser tab
Next steps
✅ Now you have Cloud9 launched and initialized, wait for the workshop instructor to continue.